Whether you want to optimize or want to know about your network capabilities, you’ve landed on the right page. This post shares quick ways to check network adapter speed on Windows 11.
1. Check Network Adapter Speed Using the Settings App
The quickest way to check the network adapter speed on Windows 11 is through the Windows Settings app. The great news is that, besides displaying the network adapter speed, the Settings app also provides information about other connection aspects, such as the network band, MAC address, and more. So, here’s how to check the network adapter connection speed using the Settings app. Step 1: Press the Windows + I key to open the Settings app. Step 2: Choose the Network & internet option from the left sidebar and then click Properties in the right pane. Step 3: You can see the network speed next to the ‘Aggregated link speed (Receive/ Transmit)’ option.
2. Check Network Adapter Speed Using the Control Panel
The Control Panel is the central hub of a Windows computer offering a wide range of functionalities. From simple customizations, such as personalizing your system, to more complex operations, like creating new user accounts, you can do it all using the Windows Control Panel. You can also use the Control Panel to check Ethernet or Wi-Fi speed that your motherboard supports. Here’s how to do that: Step 1: Press the Windows key to open the Start Menu. Step 2: In the Start Menu search bar, type Control Panel and press Enter. Step 3: Click on the ‘Network and Internet’ option. Step 4: Choose the ‘Network and Sharing Center’ option. Step 5: Click the ‘Change adapter settings’ in the left sidebar. Step 6: Right-click on your Ethernet or Wi-Fi connection and then choose Status from the context menu. You can check your network adapter speed next to the Speed field.
3. Check Network Adapter Speed Using the Command-Line Tools
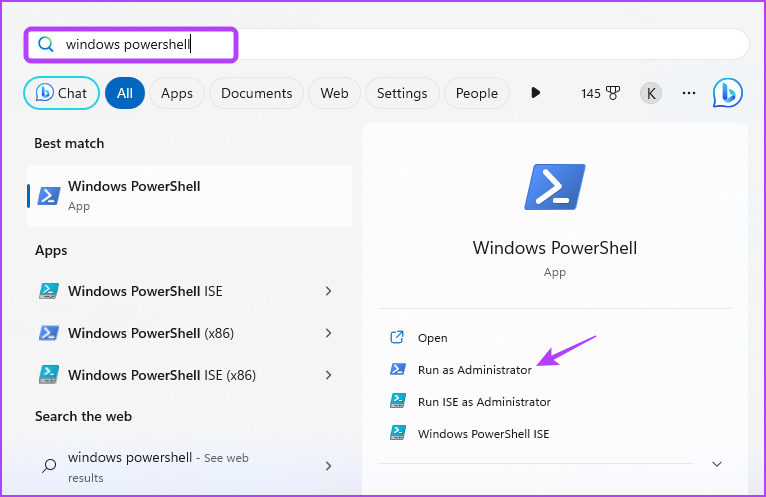
If you’re an experienced Windows user who prefers working with command-line tools, you use them to check the network adapter speed on Windows 11. To check the speed of your Ethernet or Wi-Fi interface using Command Prompt, follow these instructions: Step 1: Open the Start Menu, type Command Prompt in the search bar and then click the Run as administrator option in the right pane. Step 2: In the elevated Command Prompt window, type the following command and press Enter. Step 3: Check the Receive rate (Mbps) and Transmit rate (Mbps) fields to know the connection speed of your network adapter. Like Command Prompt, you can use Windows PowerShell to get information about your network adapter speed. Here’s how: Step 1: Launch the Start Menu, type Windows PowerShell in the search bar and then choose the Run as administrator option from the right pane. Step 2: In the elevated PowerShell window, type the following command and press Enter. After the command is executed, you’ll see both Ethernet and Wi-Fi adapter of your computer. Check the connection speed of your network adapter in the LinkSpeed column.
Know Your Computer Better
You might visit a third-party website to check our connection speed. But have you ever wondered what maximum speed your network adapter supports? If you wish to check the network adapter speed on Windows 11, you can do that using the above methods. The above article may contain affiliate links which help support Guiding Tech. However, it does not affect our editorial integrity. The content remains unbiased and authentic.


