In sleep mode, your Mac stops all visible activity while keeping the vital processes running, clearly distinguishing it from the shutdown option. However, if you find it annoying, we will go through 3 ways to prevent Mac from sleeping. Note: We are running on macOS Ventura on a MacBook. So, the options seen on the screenshot may differ, but the steps will more or less remain the same on all Mac devices.
How to Turn Off Sleep Mode on a Mac Using System Settings
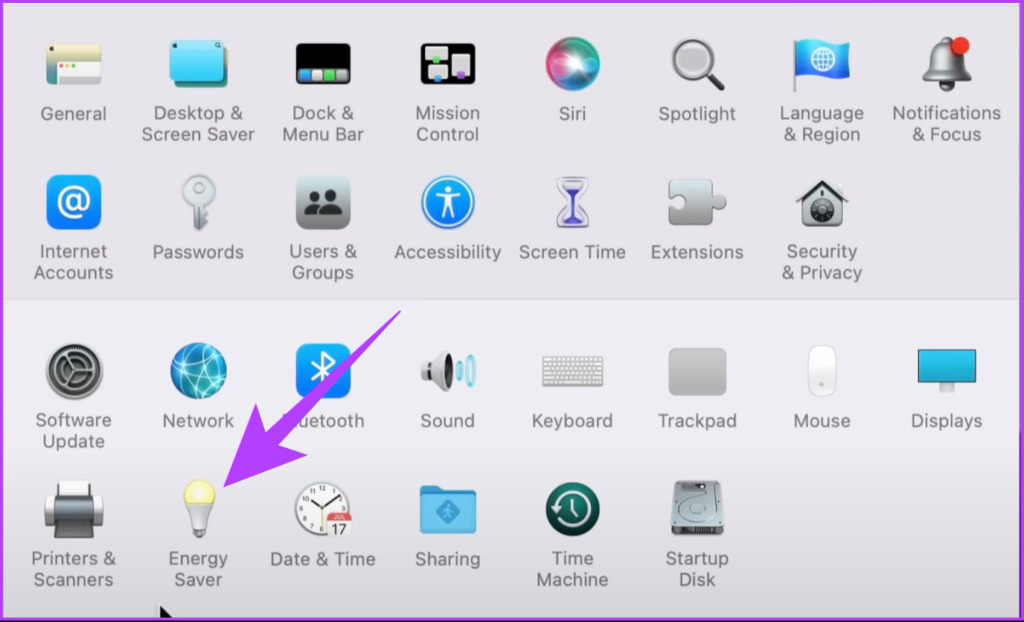
This is a straightforward process. However, after macOS Ventura’s update, a few settings have been removed, one of which is Energy Saver. If you are on a desktop Mac or Mac Studio, you can see Energy Saver. However, if you are on a MacBook, there is no such option. Instead, the option got merged with the Lock Screen. So, we are segregating the method based on the devices you use:
1. How to Keep Your Desktop Mac From Sleeping
Step 1: Press Cmd + Space on your keyboard, type System Settings, and press Return.
Step 2: Scroll down, find Energy Saver (a light bulb icon) and click on it.
Step 3: Now, tick the box next to ‘Prevent computer from sleeping automatically when the display is off.’
Step 4: Untick the box next to ‘Put hard disks to sleep when possible.’
Step 5: Finally, drag the ‘Turn display off after’ slider to Never.
There you have it. No more typing and retyping the password. If you are on a MacBook, follow the below-mentioned method.
2. Prevent MacBook From Sleeping
Step 1: Press Cmd + Space on your keyboard, type System Settings, and press Return.
Step 2: Scroll down and click on Lock Screen.
Step 3: Click on the drop-down menu next to ‘Turn display off on battery when inactive,’ and select Never.
Step 4: Now, click on the drop-down menu next to ‘Turn display off on power adapter when inactive,’ and select Never.
That’s all! It is that simple. Now, if you don’t want to do it through System Settings, there are two more methods through which you can stop your Mac from sleeping.
How to Temporarily Turn Off Sleep Mode on Your Mac Using Terminal
We will be using a command called Caffeinate. As long as the Terminal window is open, the command stops your Mac from going to sleep. Isn’t it pretty cool? Let’s begin with the steps. Step 1: Press Cmd + Space on your keyboard, type Terminal, and press Return.
Step 2: In Terminal, type caffeinate and press Return.
The only change you will notice is that the cursor will jump to a new line, and caffeinate will appear next to your username in the Terminal window.
Mind you, this only works as long as the Terminal windows remain open.
If you attempt to close the window, a warning will appear asking, ‘Do you want to terminate running processes in this window?’ If you click on Terminate, your Mac will revert to system-specific energy settings.
How to Keep MacBook From Sleeping Using Sleep Control Center
Many third-party applications keep your Mac awake, such as Amphetamine, which we have already covered in our guide on preventing Mac from sleeping when closing the lid. So, in this article, we will explore another application called Sleep Control Center.
It is a freemium app that lets you prevent your Mac from going to sleep. It is an ad-free app, and its free version is more than enough for any regular user. But if you want, you can upgrade to Pro for roughly US$2/year, which will add a few more features like Mouse Emulation Timer, Auto Unmount and Eject before sleep, and so on. All said, let’s begin with the steps. Step 1: Download Sleep Control Center from the App Store on your Mac. Once done, tap on ‘Open.’ Download Lungo
Step 2: You will now see an eye icon on your Mac’s menu bar. Click on it.
Step 3: Select ‘Prevent Display Sleep’ and ‘Prevent System Sleep.’
There you have it. Sleep Control Center is now set up on your MacBook. This is a one-time process.
Make Your Mac Insomniac
Since Apple’s silicon was added to Macs, they have become faster and last longer on a single charge. To maintain optimal performance, it makes sense to keep the system as it is, but whenever the display needs to remain awake, you can use the above options. The above article may contain affiliate links which help support Guiding Tech. However, it does not affect our editorial integrity. The content remains unbiased and authentic.


![]()