But some users have raised an issue on the official Apple Community forum that they see incorrect badge notifications. If the notification badge count is not updating or going away after reading texts on your iPhone, here are the best ways to fix incorrect badge notifications in the Messages app.
1. Use Read All in the Messages App
First, ensure you’ve actually read all the conversations in the Messages app. This also includes all those promotional texts from companies, brands, or sales agents. But reading individual messages can be tiresome, especially if your Messages app is loaded with texts. Here’s a nifty feature in the Messages app that should help eliminate the notification badge showing a wrong count on your iPhone. Step 1: Open the Messages app on your iPhone. Step 2: Tap the three horizontal dots at the top-right corner. Step 3: Tap on Select Messages. Step 4: Tap on Read All in the bottom-left corner. This will mark all the conversations as Read on your iPhone. Step 5: Close the Messages app and check if the problem is solved.
2. Enable Notification Badges Again
Every app on your iPhone shows a Notification Badge when you receive one. So if you still see an incorrect badge notification count, you can try enabling these notifications again for the Messages app. Sometimes re-enabling a feature can restore its normal functioning. Here’s how to do it on your iPhone. Step 1: Open the Settings app on your iPhone. Step 2: Scroll down and tap on Messages. Step 3: Tap on Notifications. Step 4: Tap the toggle next to Badges to disable them. Step 5: Tap on the same toggle again to enable Badges. Step 6: Close the Settings app and check if the problem is solved.
3. Force Quit and Relaunch Messages App
You can try to force quit and relaunch the Messages app on your iPhone. This will give the app a fresh start. Here’s how. Step 1: Swipe up and hold to reveal the background app windows on the home screen of your iPhone. Step 2: Swipe right to look for the Messages app. Then, swipe up to remove the Messages app window. Step 3: Relaunch Messages, close the app after reading the texts, and check if the problem is solved.
4. Turn Off Repeat Alerts
It is not always possible to respond to a text message on your iPhone. That’s why Apple gives you the option to enable Repeat Alerts. You can set the time after which you receive a Repeat Alert as the app notification sound. However, the badge notification might end up appearing again due to this alert for the Messages app. So here’s how you can try turning off Repeat Alerts on your iPhone. Step 1: Open the Settings app on your iPhone. Step 2: Scroll down and tap on Messages. Step 3: Tap on Notifications. Step 4: Scroll down to the bottom and select Customize Notifications. Step 5: Tap on Repeat Alerts. Step 6: Select Never to turn off Repeat Alerts. Step 7: Close the Settings app and check if the problem is solved.
5. Summon Siri to Read Your Messages
If the notification badge still shows a wrong count for the Messages app, you can summon Siri to read your messages and mark them as Read. This is something that has worked for a few users. Simply pick up your iPhone and say ‘Hey Siri, Read My Messages’. Try this and see if the problem gets solved. You can refer to our post if Siri is not working on your iPhone.
6. Update the Messages App
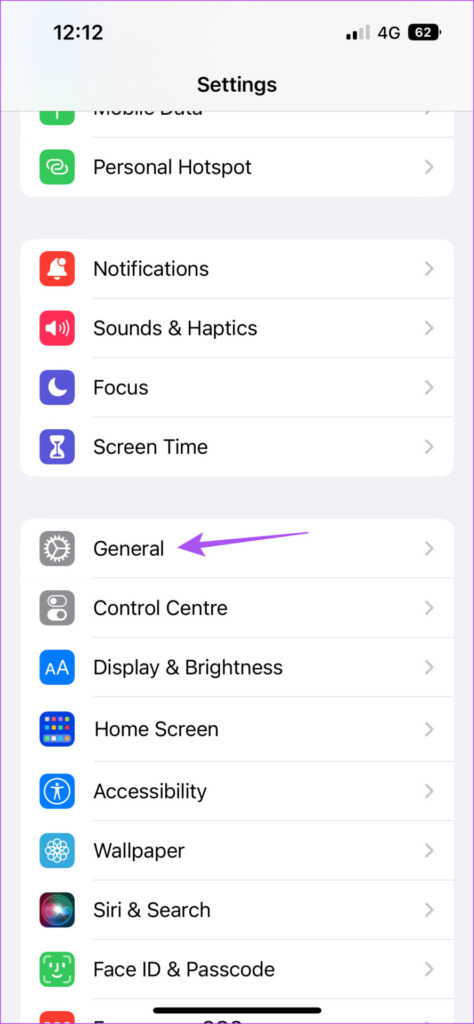
Lastly, if none of the solutions mentioned above have worked for you, there must be some bug or glitch in the current version of the Messages app on your iPhone. So we suggest updating the app to its latest version by installing a new version of iOS. Here’s how. Step 1: Open the Settings app on your iPhone. Step 2: Tap on General. Step 3: Select Software Update. Step 4: If an update is available, download and install it. After installing the update, your iPhone will restart. Then, check if the problem is solved with badge notifications of the Messages app.
Get Notified
These solutions will help you to get notified and eliminate wrong badge notifications on the Messages app. Facing trouble syncing messages across devices? Refer our post on how to sync messages from iPhone to Mac. The above article may contain affiliate links which help support Guiding Tech. However, it does not affect our editorial integrity. The content remains unbiased and authentic.


