To sort out DirectX video or audio issues for games on in Windows, the DirectX Diagnostic Tool can help you identify the real issue and also save time instead of tinkering around a lot of options. In this post, we’ll explore six ways via which you can access the DirectX Diagnostic Tool in Windows 11. So, let’s begin.
1. Access DirectX Diagnostic Tool Using the Start Menu
The Start Menu is the go-to option for accessing and launching applications, settings, files, and folders on a Windows PC. Typically, the Start Menu contains a search bar, a list of the most used applications, and an All Apps button that leads to all the apps installed on the computer. To use the Windows Start Menu to open DirectX Diagnostic Tool, follow the below instructions: Step 1: Press the Windows key to open the Start Menu. Step 2: Type dxdiag in the search bar and click the Open option in the right pane.
That’s it! The DirectX Diagnostic Tool will appear on your computer screen.
2. Access the DirectX Diagnostic Tool Using the Run Tool
The Run tool is another Windows utility that lets you quickly open files, folders, programs, and other system tools by entering commands into its search bar. You can access the Run tool using its keyboard shortcut or searching for it in the Start Menu. Here’s how to open the DirectX Diagnostic Tool using the Run tool. Step 1: Press the Windows + R keyboard shortcut to open the Run tool. Step 2: In the search bar, type dxdiag and click OK.
3. Access the DirectX Diagnostic Tool Using the Task Manager
Task Manager, as the name suggests, lets you manage tasks running on your computer. You can also use it to check system performance, app history, configure startup applications, access services, and launch different tools. To open DirectX Diagnostic Tool using the Task Manager, follow these steps: Step 1: Right-click on the Windows icon in the Taskbar and choose Task Manager from the menu that crops up.
Step 2: Click the Run new task button at the top.
Step 3: Type dxdiag and press Enter.
4. Access the DirectX Diagnostic Tool Using Its Shortcut
Whether for checking installed drivers or learning about the DirectX components, if you regularly use the DirectX Diagnostic Tool, you can create its desktop shortcut to access it within a few clicks. Here’s how to do that: Step 1: Right-click on the black space on your Windows desktop, select New from the context menu and choose Shortcut.
Step 2: Type dxdiag in the ‘Type the location of the item’ option and click Next.
Step 3: Give an appropriate name to the shortcut and click Finish.
That’ll create a DirectX Diagnostic Tool shortcut on the desktop. So you can double-click the shortcut to open the tool directly. You can also assign a keyboard shortcut to the DirectX Diagnostic Tool. This will be helpful when your mouse stops working for any reason. To set up a keyboard shortcut for opening the DirectX Diagnostic Tool, follow these steps: Step 1: Right-click the DirectX Diagnostic Tool shortcut on the desktop and choose Properties from the context menu.
Step 2: Switch to the Shortcut tab. Step 3: Click the box next to the Shortcut key and then press a key combination on your keyboard you want to assign as a shortcut to open the tool. We recommend using the Control + Shift + D keyboard shortcut.
Step 4: Click Apply button and then hit OK to save the changes.
5. Access the DirectX Diagnostic Tool Using the Command-Line Tools
Command-Line tools like Windows PowerShell and Command Prompt can also be useful to launch the DirectX Diagnostic Tool. Here’s how to use Windows PowerShell to access the DirectX Diagnostic Tool in Windows 11: Step 1: Press the Windows key to open the Start Menu, type Windows PowerShell in the search bar and press Enter.
Step 2: Type dxdiag in the PowerShell window and press Enter.
Similarly, you can use Command Prompt to access the tool. Open the Search Menu, search for Command Prompt, hit Enter to launch it. Then type dxdiag in the Command Prompt window and press Enter.
6. Access the DirectX Diagnostic Tool From the Desktop Context Menu
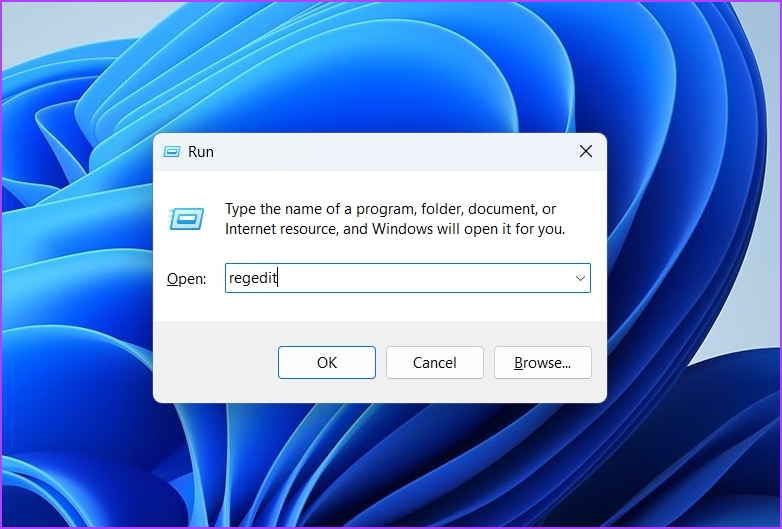
Windows 11 lets you add features and programs to the desktop context menu to quickly access them within a few clicks. You can add DirectX Diagnostic Tool to the desktop context menu by following the below steps: Note that we’ll be editing the registry in the following steps. So, don’t forget to create a backup of your registry, which will help you restore settings if something goes wrong. Step 1: Press Windows + R keyboard shortcut to open the Run tool, type regedit, and click OK.
Step 2: In the Registry Editor window, navigate to the following location: Step 3: Right-click on the shell key in the left sidebar, choose New, and select Key from the sub menu.
Step 4: Type DirectX Diagnostic Tool in the name box to assign a name and press Enter.
Step 5: Right-click on the DirectX Diagnostic Tool key you just created, choose New, and select Key from the sub menu. Step 6: Type command to assign it as a name for the newly created Key and press Enter.
Step 7: Select the command key in the left sidebar and double-click on the Default string in the right pane.
Step 8: Paste the following location in the Value data section and click OK.
Next, restart your computer for the changes to take effect. After your computer reboots, right-click on the desktop view and you’ll see DirectX Diagnostic Tool in the Context Menu.
Quickly Launch the DirectX Diagnostic Tool
These were all the working methods to access the DirectX Diagnostic Tool in Windows 11. Let us know which of the above methods you like the most. Also, feel free to share any other way to launch the DirectX Diagnostic Tool in Windows. The above article may contain affiliate links which help support Guiding Tech. However, it does not affect our editorial integrity. The content remains unbiased and authentic.


![]()