But what if you don’t wish to use this service for specific websites? It’s good that Apple lets you disable iCloud Privacy Relay for a specific website. We will show you how to disable Privacy Relay on your iPhone and iPad.
What Is the Need for Privacy Relay?
Before showing the steps, let’s quickly understand the use of iCloud Privacy Relay on your iPhone and iPad. Did you start seeing ads on a social media app right after browsing for a product on a website? This is because companies like Facebook, Instagram, and Twitter build your profile based on the DNS queries of the websites you visit.
To prevent this, iCloud Privacy Relay will redirect web traffic toward a third-party server, and even Apple won’t have access to it. The DNS request will be split up from your IP address, and it will be encrypted by sending the encryption keys to a third-party server. So Apple won’t be able to see the website that you visit. Only your IP address with your approximate location will be available for the company.
How to Enable iCloud Privacy Relay
By default, the iCloud Privacy Relay is disabled. Let’s check out how to enable iCloud Privacy Relay on your iPhone and iPad manually. The steps remain the same for both devices. Step 1: Open Settings on your iPhone or iPad.
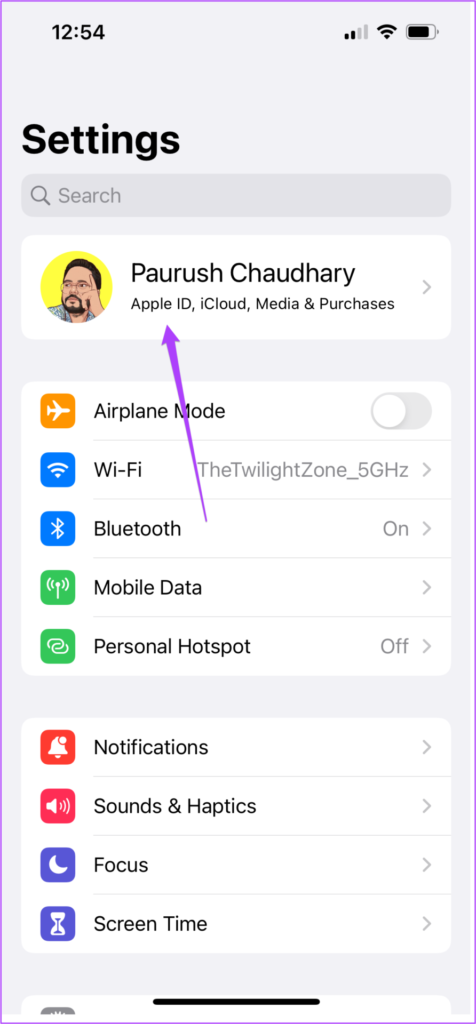
Step 2: Tap on your profile name at the top.
Step 3: Tap on iCloud.
Step 4: Scroll down and tap on Private Relay.
Step 5: Tap the toggle next to Private Relay to enable the feature.
How to Disable iCloud Privacy Relay for a Specific Website
After you enable iCloud Privacy Relay, you can disable it for specific websites. Do note that this feature is only available for the Safari browser. If you prefer third-party browsers like Chrome or Firefox, you’ll need to completely disable iCloud Privacy Relay to stop hiding your IP Address. The steps remain the same for iPhone and iPad. Step 1: Open Safari on your iPhone and iPad.
Step 2: Open the website on which you wish to disable the feature. Step 3: Tap the aA icon on the bottom-left side of the Address Bar.
If the Address Bar at the top, tap on the aA icon on the top-left side. Step 4: Tap on Show IP Address.
Step 5: When the prompt appears on the screen, tap Continue to confirm.
After that, your IP address (the IP address of the iPhone or iPad) will be temporarily visible to the website and your Internet Service Provider. Do note that the Privacy Relay feature will re-enabled when you reload the same tab to visit another website.
How to Completely Disable iCloud Privacy Relay
If you prefer using third-party browsers like Chrome and Firefox on your iPhone or iPad, you can disable the iCloud Privacy Relay feature to stop hiding your IP address. The steps remain the same for iPhone and iPad users. Step 1: Open Settings on your iPhone or iPad.
Step 2: Tap on your profile name at the top.
Step 3: Tap on iCloud.
Step 4: Scroll down and tap on Private Relay.
Step 5: Tap the toggle next to Private Relay to disable the feature.
Step 6: You can tap on ‘Turn Off Until Tomorrow’ or ‘Turn Off Private Relay’ as required.
If you select ‘Turn Off Until Tomorrow,’ you can follow the same steps again to turn off the feature as per your choice permanently.
Make Your Choice
It’s great that Apple has provided more control to users over privacy. iCloud Privacy Relay and Hide My Email are useful features for saving yourself from going under the radar of unnecessary ads that can ruin your overall experience. Though this feature is available only for Safari, other privacy-focussed browsers for iPhone and iPad can help you safeguard your browsing preferences from trackers. You can install them to improve your privacy further online. The above article may contain affiliate links which help support Guiding Tech. However, it does not affect our editorial integrity. The content remains unbiased and authentic.


