As you type on the Microsoft Word document, Word uses AutoCorrect feature to fix the typos instead of highlighting them. Here’s how to edit your AutoCorrect settings on Microsoft Word.
How to Enable or Disable AutoCorrect on Microsoft Word
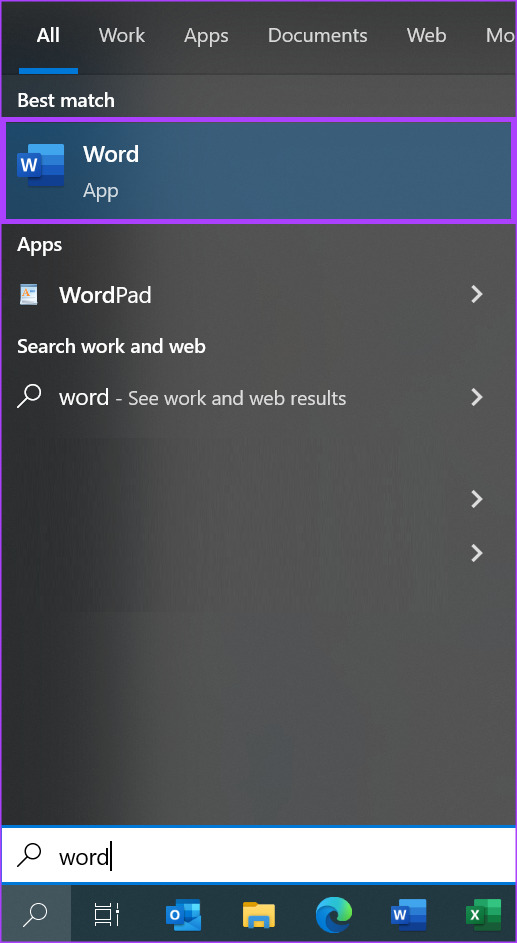
By default, AutoCorrect feature relies on the library of the words from the language you’ve chosen to use in the Word document. That said, you can enable or disable the feature. For that, you will need to update your Word Proofing settings. Here’s how to do so: Step 1: Click the Start button on the Task bar and type word to search for the app.
Step 2: From the results, click on the Microsoft Word app to open it.
Step 3: On the Word Ribbon, click on the File tab at the top-left corner.
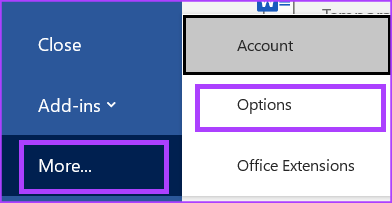
Step 4: Scroll to the bottom of the File menu and click on More or Options to reveal a collapsed menu.
Step 5: Click Options from the menu.
Step 6: From Word Options pop-up window, click Proofing from the left sidebar.
Step 7: Scroll down the proofing menu and click the AutoCorrect Options button to launch a new AutoCorrect box for the language setting enabled for your Microsoft Word document. For example, if your language setting for Word is English (United States), the AutoCorrect dialog box that will launch will be AutoCorect: English (United States).
Step 8: On the newly launched AutoCorrect dialog box, click the AutoCorrect tab.
Step 9: To enable AutoCorrect, tick the box beside Replace text as you type. To disable AutoCorrect, untick the box beside ‘Replace text as you type.’
Step 1o: Click OK to save your changes.
How to Add Entries to the AutoCorrect List on Microsoft Word
The Word Proofing settings also includes a Replacement list that comes in handy when you don’t want to keep switching between the correct and actual spellings. This Replacement list contains different variations of word misspellings and diagram depictions with their replacement options. You can update this list to include new replacements. Here’s how to do so: Step 1: Click the Start button and type word to search for the app.
Step 2: From the results, click on the Microsoft Word app or document to open it.
Step 3: On the Word Ribbon, click on the File tab at the top-left corner.
Step 4: Scroll to the bottom of the File menu and click on More Options to reveal a collapsed menu.
Step 5: Click Options from the menu.
Step 6: From the Word Options pop-up window, click the Proofing tab in the left sidebar.
Step 7: Scroll down the proofing menu and click on the AutoCorrect Options button to launch a new AutoCorrect box for the language setting enabled for your Microsoft Word document.
Step 8: On the newly launched AutoCorrect dialog box, click the AutoCorrect tab.
Step 9: In the textbox beneath Replace, type a word or phrase that you often misspell.
Step 10: In the With box, type the correct spelling of the word.
Step 11: Click the Add button to save your new word.
Step 12: Click OK to close the dialog box.
How to Delete Entries From the AutoCorrect List on Microsoft Word
At times, you might find some entries carrying incorrect or different spelling. Luckily, you can also follow the same process as mentioned above to remove entries from the AutoCorrect list. Here’s how to do so: Step 1: Click the Start button and type word to search for the app.
Step 2: From the results, click on the Microsoft Word app or document to open it.
Step 3: On the Word Ribbon, click on the File tab at the top-left corner.
Step 4: Scroll to the bottom of the File menu and click on More Options to reveal a collapsable menu.
Step 5: Click Options from the menu.
Step 6: From the Word Options pop-up window, click the Proofing tab in the left sidebar.
Step 7: Scroll down the proofing menu and click on the AutoCorrect Options button to launch a new AutoCorrect box for the language setting enabled for your Microsoft Word document.
Step 8: On the newly launched AutoCorrect dialog box, click the AutoCorrect tab.
Step 9: Scroll through the Replacement list and click on the entry you want to delete.
Step 10: Click the Delete button to remove the word from the list.
Step 11: Click OK to close the dialog box.
Enabling Auto Capitalization in Microsoft Word
Another proofing setting you can edit in Microsoft Word is auto-capitalization. With Word’s auto-capitalization setting, you can ensure words or phrases that should or should not have capital letters get the right treatment automatically. The above article may contain affiliate links which help support Guiding Tech. However, it does not affect our editorial integrity. The content remains unbiased and authentic.


![]()


![]()
