Different from putting your device to sleep, screen timeout simply turns the screen off. So, moving your cursor or using the keyboard will instantly make your device come back to life, with the screen opening to where you last left off. This can come in handy if you want to save on battery power. However, once the screen timeout duration is over, your device might go to sleep. So, read on as we have a look at 3 easy ways to change screen timeout in Windows 11.
1. Change Windows 11 Screen Timeout Using Settings
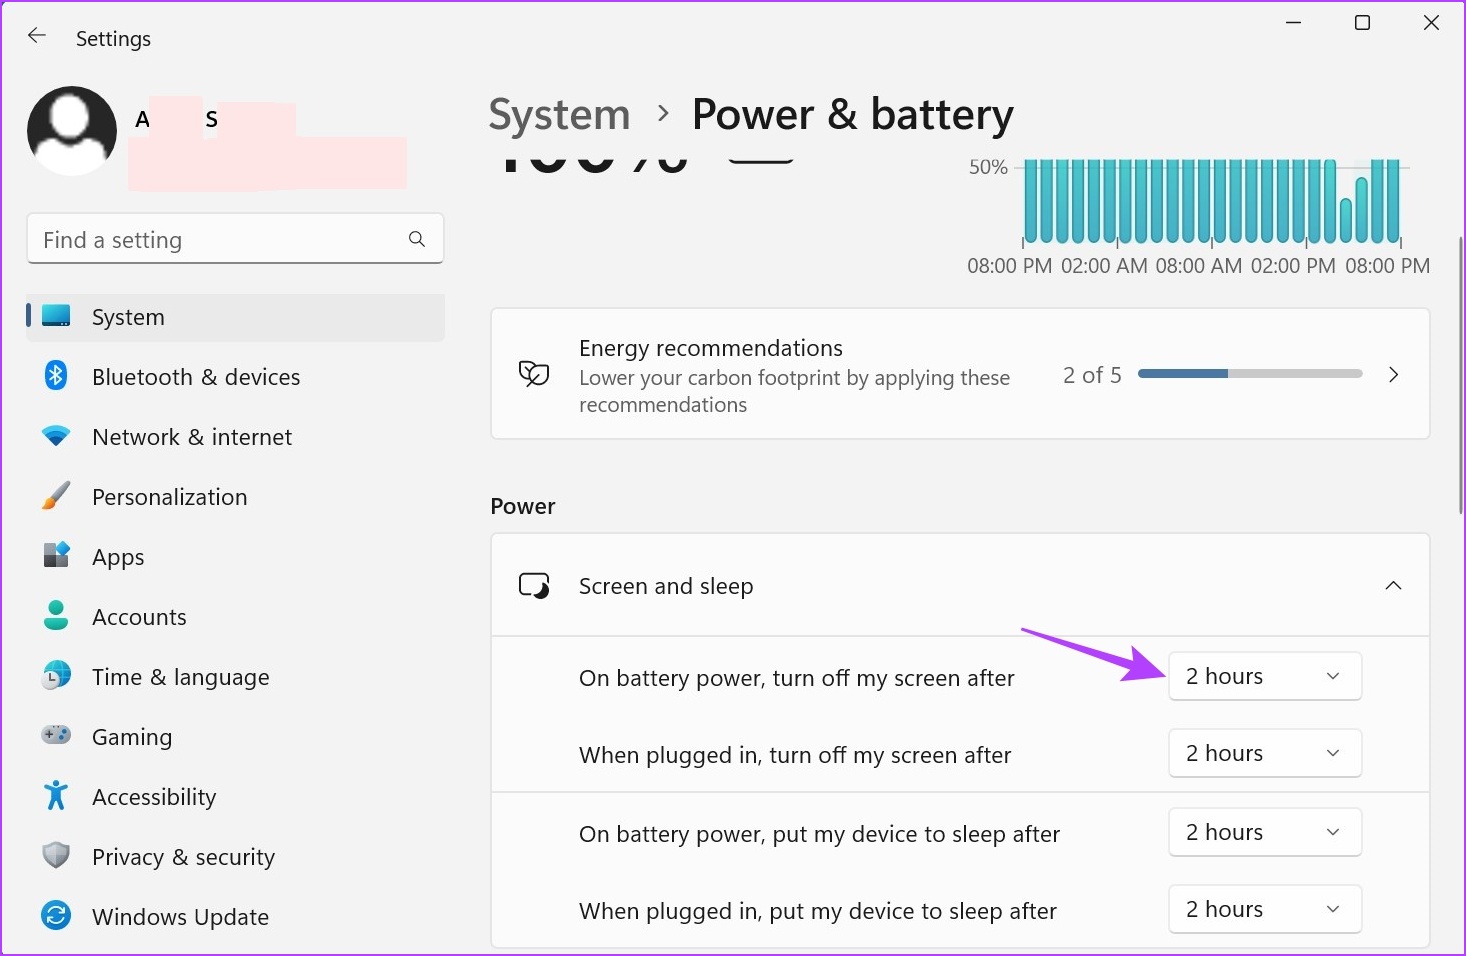
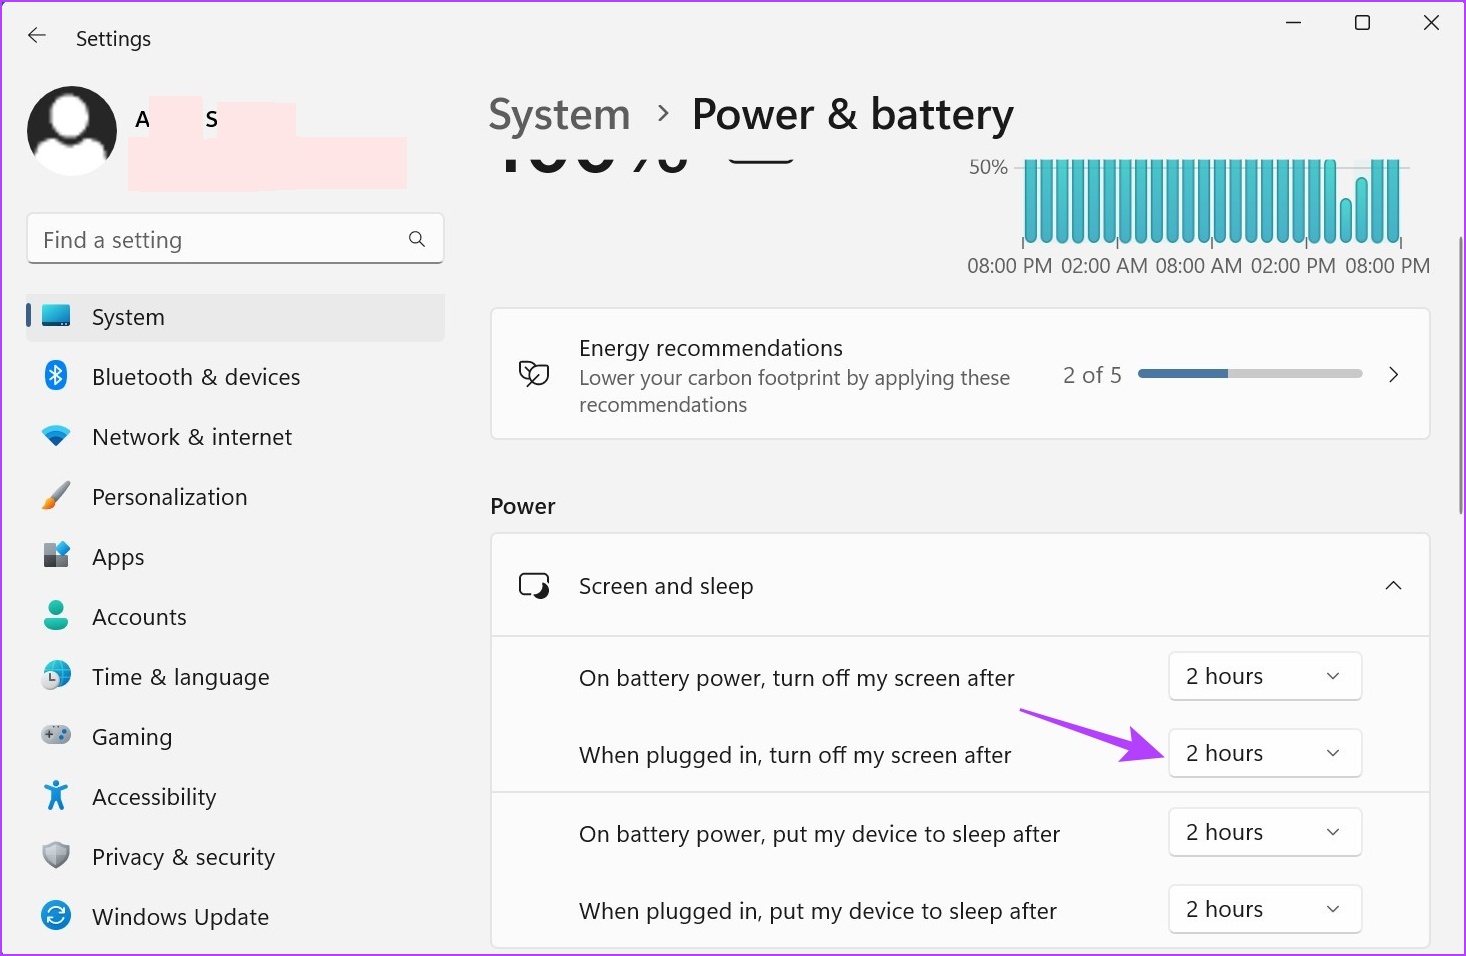
You can easily change Windows 11 screen timeout duration using the Settings app. This will allow you to adjust the screen timeout duration for when your device is plugged in and on battery power. Follow the below steps to do it. Step 1: Right-click on the Windows icon and click on Settings from the options. Step 2: Select the System tab in the sidebar and scroll down and click on ‘Power & battery’ on the right. Step 3: Here, click on ‘Screen and sleep’ to expand the options. Step 4: Now, click on the drop-down next to the ‘On battery power, turn off my screen after’ to adjust the screen timeout duration for when your device is on battery power. Step 5: Select your preferred duration from the given timeout options. Step 6: Then, click on the drop-down menu next to ‘When plugged in, turn off my screen after’ to change the screen timeout duration for when your device is plugged in. Step 7: Select the duration you want. This will adjust the Windows 11 screen timeout duration according to your preferences. You can also check out our guide to fixing Windows 11 screen locking automatically.
2. Change Screen Timeout in Windows 11 Using Control Panel
There are 2 major ways that can be used to change screen timeout in Windows 11 when using the Control Panel. So, apart from using the Power Options menu, you can also use the Advanced Power Plan settings to make the necessary changes. Follow the below steps to do it.
Method 1: Using Power Options
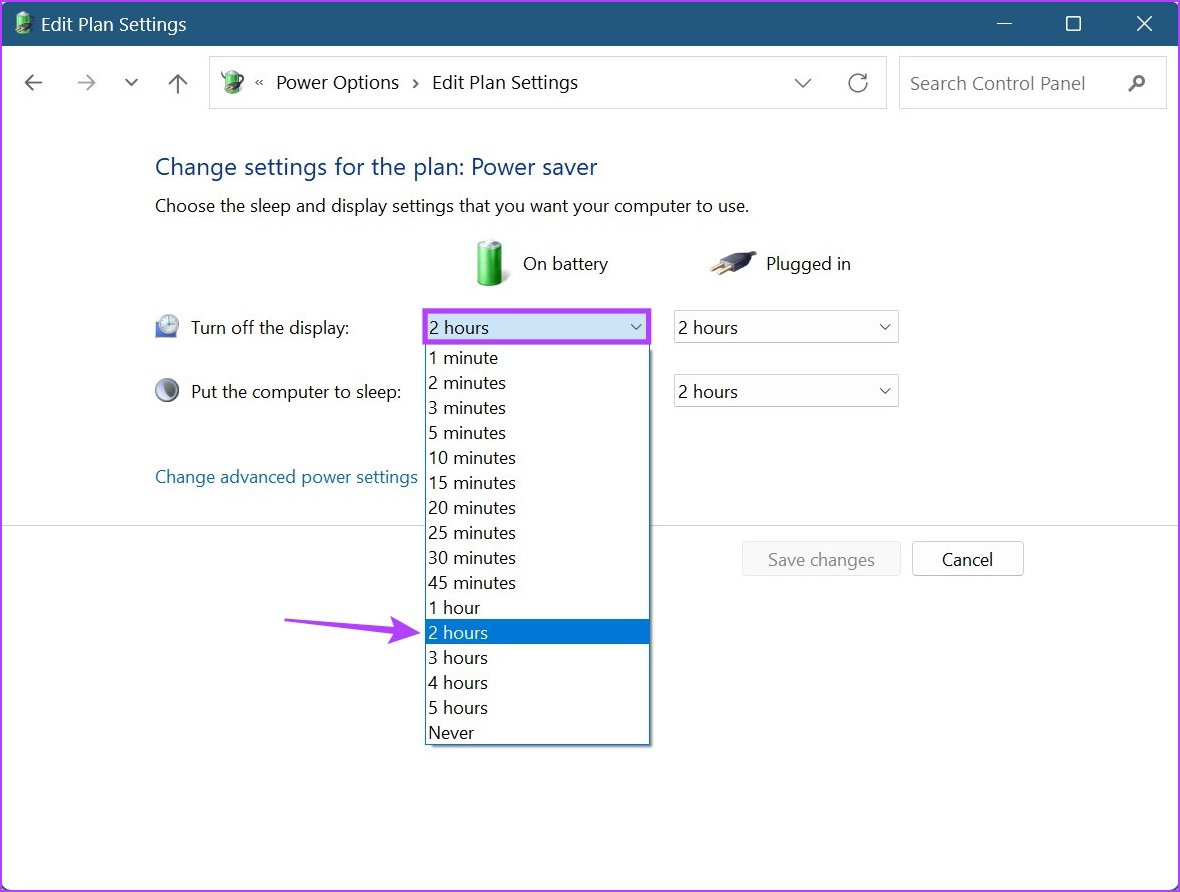
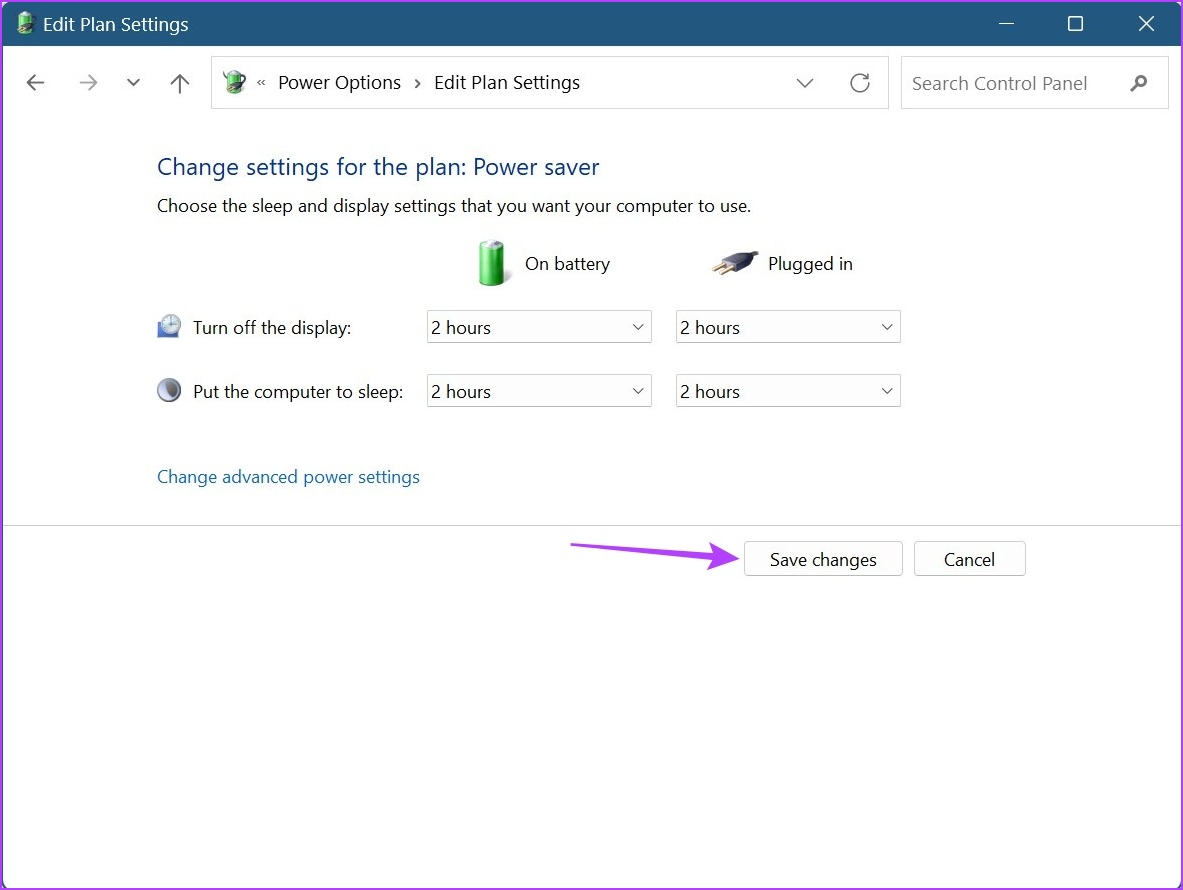
Step 1: Click on Search and type Control Panel. Then, open the Control Panel from the search results. Step 2: Here, click on ‘Hardware and Sound’. Step 3: Click on Power Options. Step 4: From the sidebar, click on ‘Choose when to turn off the display’. Step 5: Here, click on the first drop-down in front of ‘Turn off the display’ to adjust screen timeout when on battery power. Step 6: Then, click on the second drop-down to select the preferred screen timeout duration for when your device is plugged in. Tip: You can also change the time when your computer goes to sleep. Step 7: Once done, click on Save changes.
Method 2: Using Advanced Power Plan Settings
Step 1: Click on Search and type Control Panel. Then, open the Control Panel from the search results. Step 2: Click on ‘Hardware and Sound’. Step 3: Here, click on ‘Change plan settings’ next to your currently active power plan. It’s Balanced in our case. Step 4: Then, click on ‘Change advanced power settings’. This will open a separate window for Power Options. Step 5: Scroll down and click on Display. Once it expands, click on ‘Turn off display after’. Then, click on the time duration in front of On battery. Step 5: Select a duration. Step 6: Again, click on the time in front of Plugged in and select a duration. Step 7: Then, click on Apply and OK to save and exit the window. This will change the lock screen timing in Windows 11.
3. Modify Screen Timeout Using Windows 11 Command Prompt
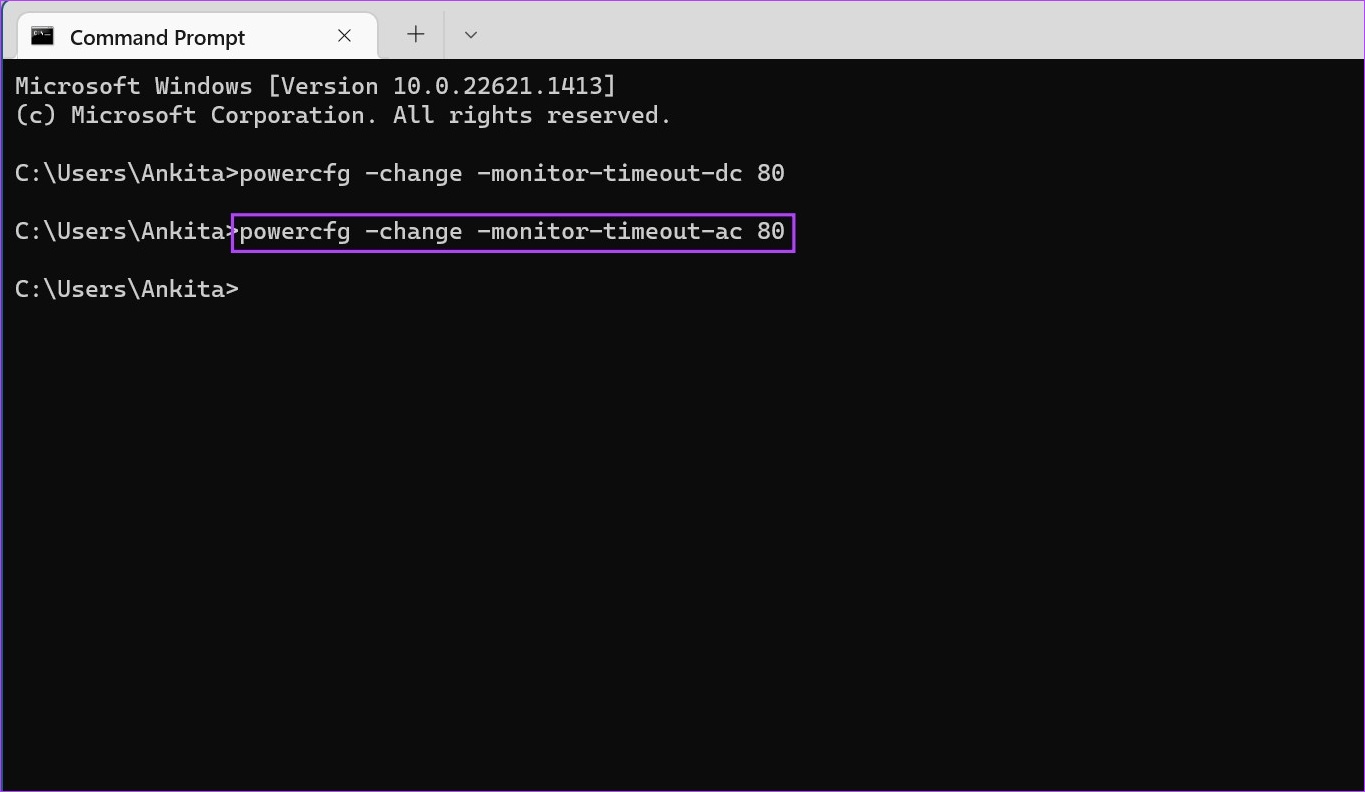
While you can also use the Command Prompt to modify screen timeout in Windows 11, unlike the ways listed above, here you will have to input the exact duration you want in minutes. Follow the below steps to do it. Step 1: Right-click on the Windows icon and select Terminal. Step 2: Click on the downward arrow once Terminal opens and click on Command Prompt. Step 3: Here, type out the following command and replace the x with the time duration you want to set. This value should be in minutes. Step 4: Then, press enter. This will change the screen timeout duration when your device is on battery power. Step 5: Additionally, you can also type the following command to change the screen timeout duration when your device is plugged in. Simply replace the x with your desired duration in minutes. Step 6: Then, press enter to execute the command. This will modify your existing Windows 11 lock screen timeout settings. If you want, you can also set up wake timers using the Command Prompt to make your Windows 11 device’s screen wake up at a scheduled time.
Change Screen Timeout Settings
So, these were all the ways to change screen timeout in Windows 11. And while technically you can set screen timeout at Never to ensure the screen always stays on, it is always recommended to have a timer on, especially when your device is operating on battery power. If you wish to further customize your device, check out how to change the screen resolution in Windows 11. The above article may contain affiliate links which help support Guiding Tech. However, it does not affect our editorial integrity. The content remains unbiased and authentic.