Depending on your situation, resolving the problem can be as simple as changing the desktop background settings or as complex as editing registry files. Let’s go over all the possible solutions to stop the desktop background from changing automatically on Windows 11.
1. Check Desktop Background Settings
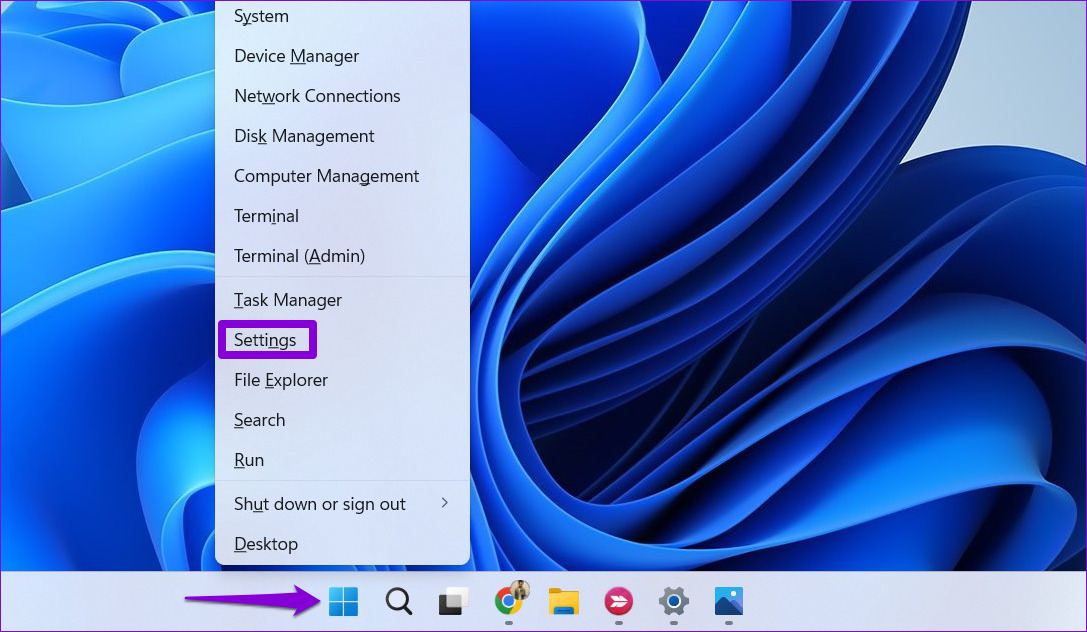
Enabling wallpaper slideshow in Windows can cause your desktop background to change at regular intervals. So, it’s a good idea to use a static image as a wallpaper for your computer’s desktop. Here’s how you can do that quickly. Step 1: Right-click on the Start icon and select Settings from the list.
Step 2: Switch to the Personalization tab and select Background from the right pane.
Step 3: Use the drop-down menu next to Personalize your background to select Picture or Solid color.
Following this, your desktop background will be a static image and then you can observe whether it changes.
2. Prevent Windows From Syncing Settings
Enabling Windows sync allows you to synchronize your settings and preferences across multiple devices. As a result, when you change the desktop background on one device, it affects all linked devices. If you don’t want that to happen, here’s how to stop Windows from syncing your settings. Step 1: Click on the Start button on the Task bar to open the Start menu and click the gear-shaped icon to launch the Settings app.
Step 2: Click the Accounts tab on the left sidebar and select Windows backup from the right pane.
Step 3: Click on ‘Remember my preferences’ and clear the checkmark in front of the ‘Other Windows settings’ option.
Alternatively, you can disable the ‘Remember my preferences’ toggle to prevent Windows from syncing any data.
3. Check Ease of Access Settings
The Ease of Access settings in Windows makes it simple for people with disabilities or impairments to use their computers. If you’ve recently altered any of these settings to improve screen visibility, Windows may change the desktop background. Here’s how you can stop that. Step 1: Click the search icon on the taskbar, type control panel in the box, and select the first result that appears.
Step 2: In the Control Panel window, use the drop-down menu in the top right corner to change the view type to Large icons. Then, click on Ease of Access Center.
Step 3: Click ‘Make the computer easier to see.’
Step 4: Scroll down to clear the ‘Remove background images’ checkbox and then hit Apply.
4. Delete Corrupt Theme Files
It’s possible that the existing theme files on your computer have become corrupted or inaccessible. If that’s the case, you’ll need to get rid of the damaged theme files. This will force Windows to cache theme files again and resolve the issue. Here’s how you can go about it. Step 1: Press the Windows key + R to open the Run dialog box. Step 2: Copy and paste the following path in the Open field and press Enter:
Step 3: When the File Explorer opens, click the View menu at the top, select Show, and choose the Hidden items option.
Step 4: Press Ctrl + A to select everything within the Themes folder and click the trash icon at the top to delete it.
After completing the above steps, set the desktop background once again and see if that fixes the issue.
5. Use the Registry Editor to Lock Desktop Background Settings
If you’re using a shared computer, you can stop other users from changing the desktop background by modifying a few registry files. Of course, this is only possible if you have administrative privileges on Windows. Since modifying registry files is risky, it’s a good idea to back up your registry files before proceeding with the changes below. Step 1: Press the Windows key + R to open the Run tool. Type regedit in the box and press Enter.
Step 2: Select Yes when the User Account Control (UAC) prompt appears.
Step 3: In the Registry Editor window, paste the following path in the address bar at the top and press Enter.
Step 4: Right-click on the Policies key, go to New, and select Key from the sub-menu. Name the key ActiveDesktop.
Step 5: Right-click the ActiveDesktop key, go to New, and select DWORD (32-bit) Value. Name the DWORD NoChangingWallPaper.
Step 6: Double-click the NoChangingWallPaper value and enter 1 in the Value data field. Then, click OK.
Restart your PC to apply the changes. After this, Windows will restrict access to the desktop background settings and the background image won’t keep changing.
6. Install Windows 11 Updates
It’s always a good idea to keep Windows updated to the most recent version. If the desktop background issue is caused by a faulty system update, installing newer updates will help. Press the Windows key + I to launch the Settings app. In the Windows Update tab, click the Check for updates button.
Download and install any pending system updates and see if that resolves the issue.
Stop the Background Madness
One of the above fixes should prevent your desktop background from changing automatically. However, if none of the solutions work, there’s a good chance that your PC is infected by malware. You can scan your system using Windows Defender to check for this possibility. The above article may contain affiliate links which help support Guiding Tech. However, it does not affect our editorial integrity. The content remains unbiased and authentic.


![]()


